Labels
Add and edit text labels directly on the map.
Steps
- Click Add Layer, then select Labels. The label layer will be added to the map.

Click the Pencil icon to start placing labels on the map.
To edit a label already on the map, click the label and update its text or position.
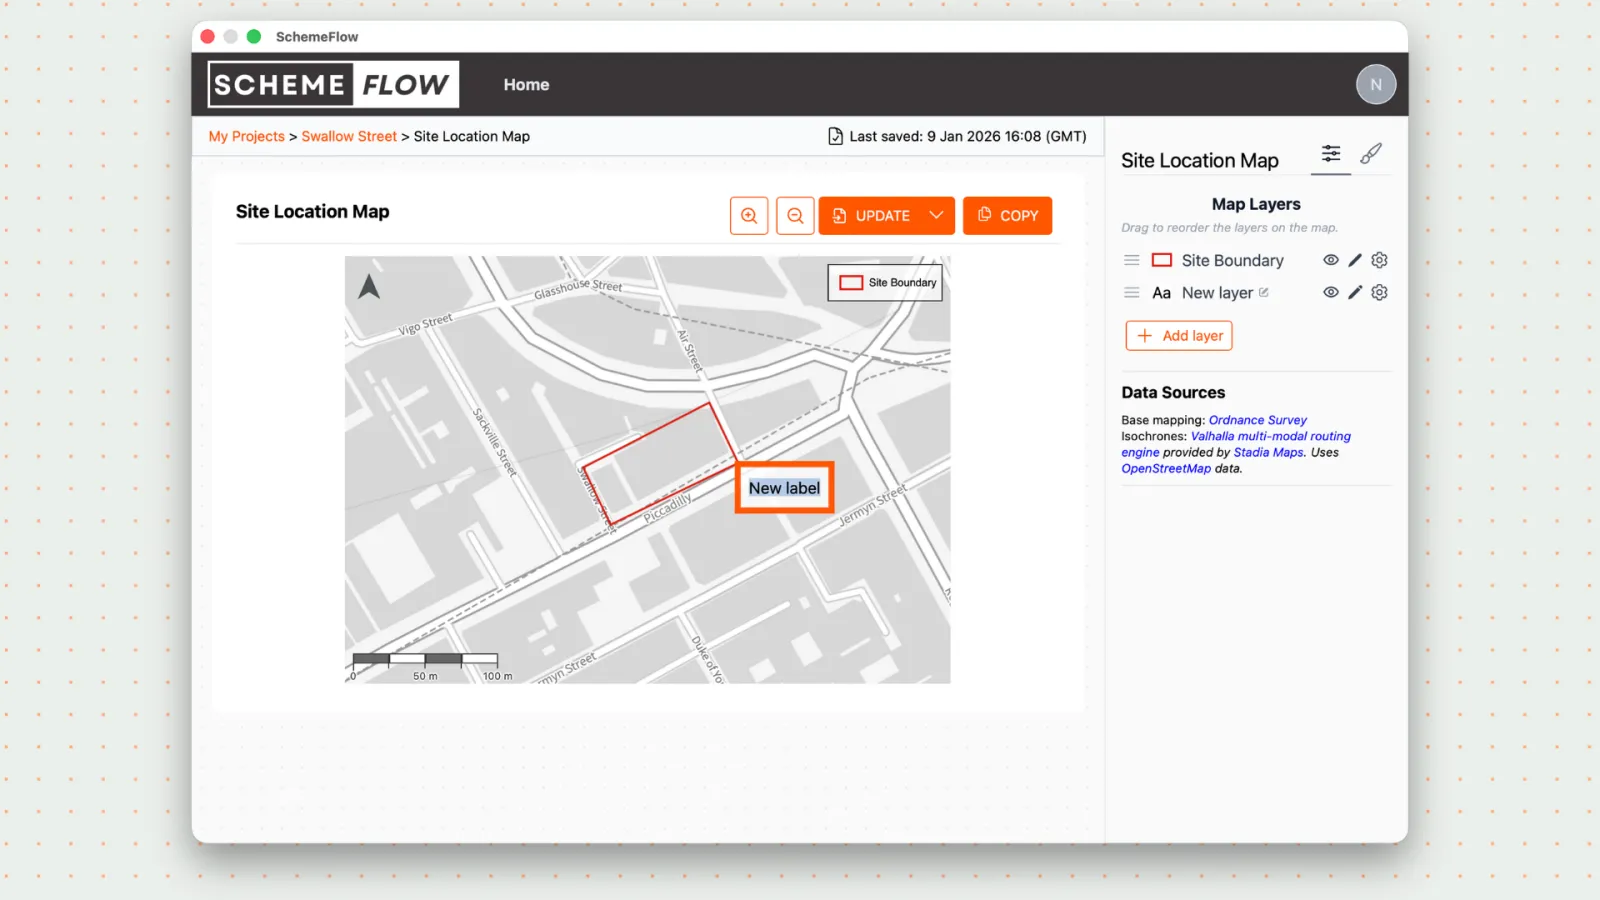
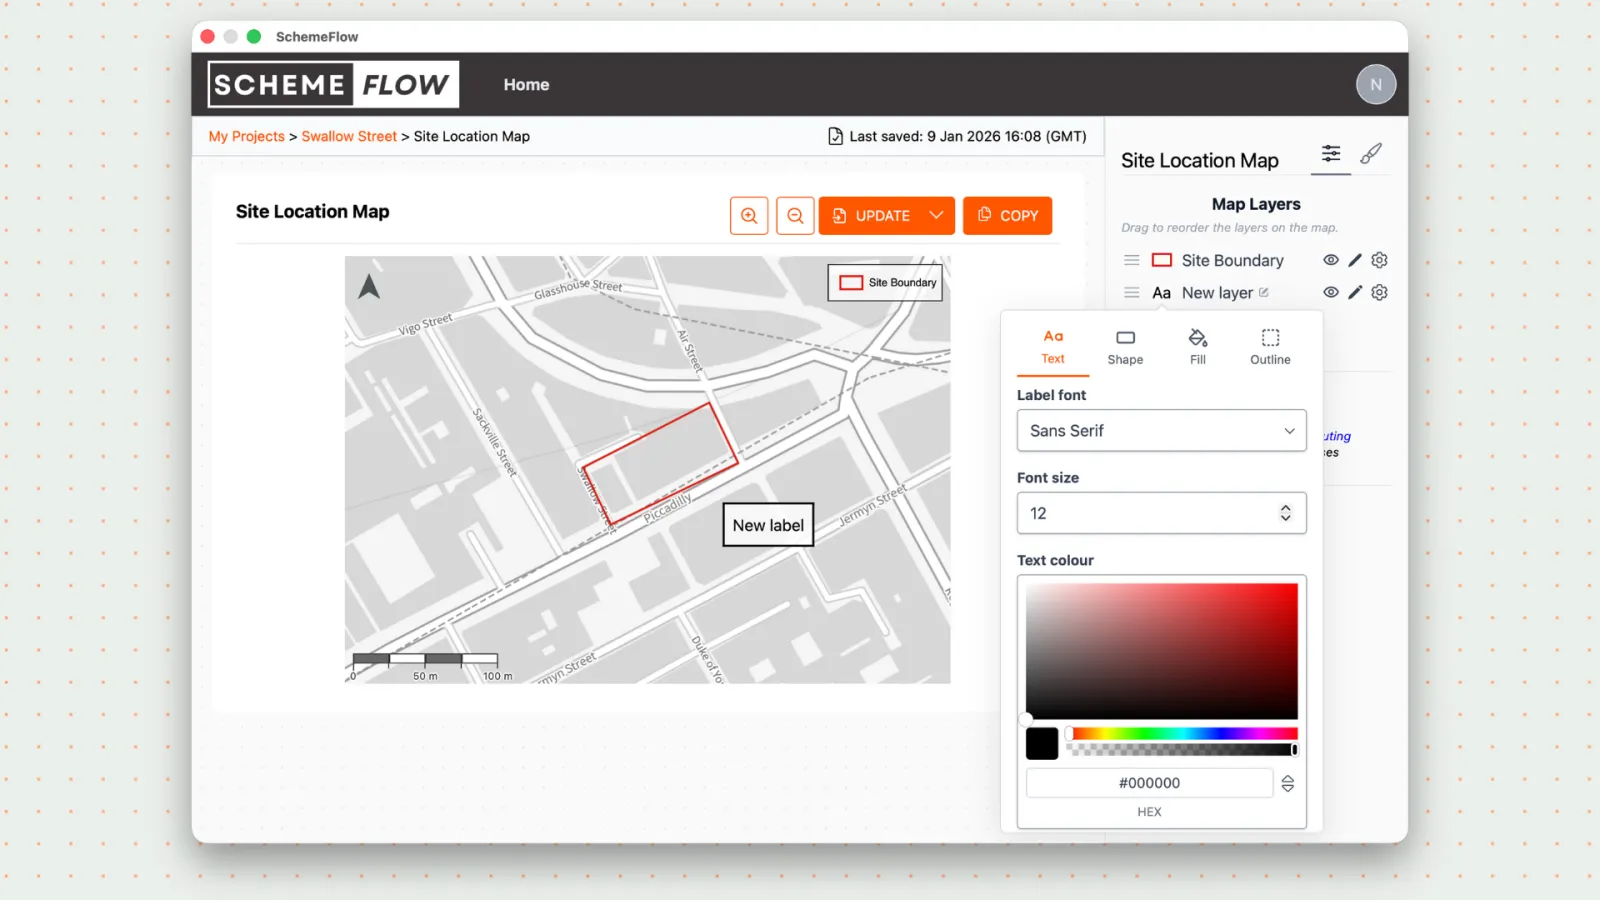
To style a label, click the label on the map. This opens the styling menu, where you can:
- Change the font
- Adjust the text size
- Change the label shape
- Change the shape colour
- To remove a label or delete the entire label layer, click the Cog icon.

When you're ready, click Update to insert the map into the document.
To save the label styling, click the Paint Brush icon and select Company Styles.
Notes
- Label styling applies to all labels within the same layer.
- Changes are not applied to the document until Update is clicked.