Generating Reports Using Shapefiles
This guide explains how to add a site boundary to SchemeFlow using shapefiles exported from QGIS.
Steps
Select features in QGIS
Open QGIS and use the Select Feature tool to highlight the features you want to export.
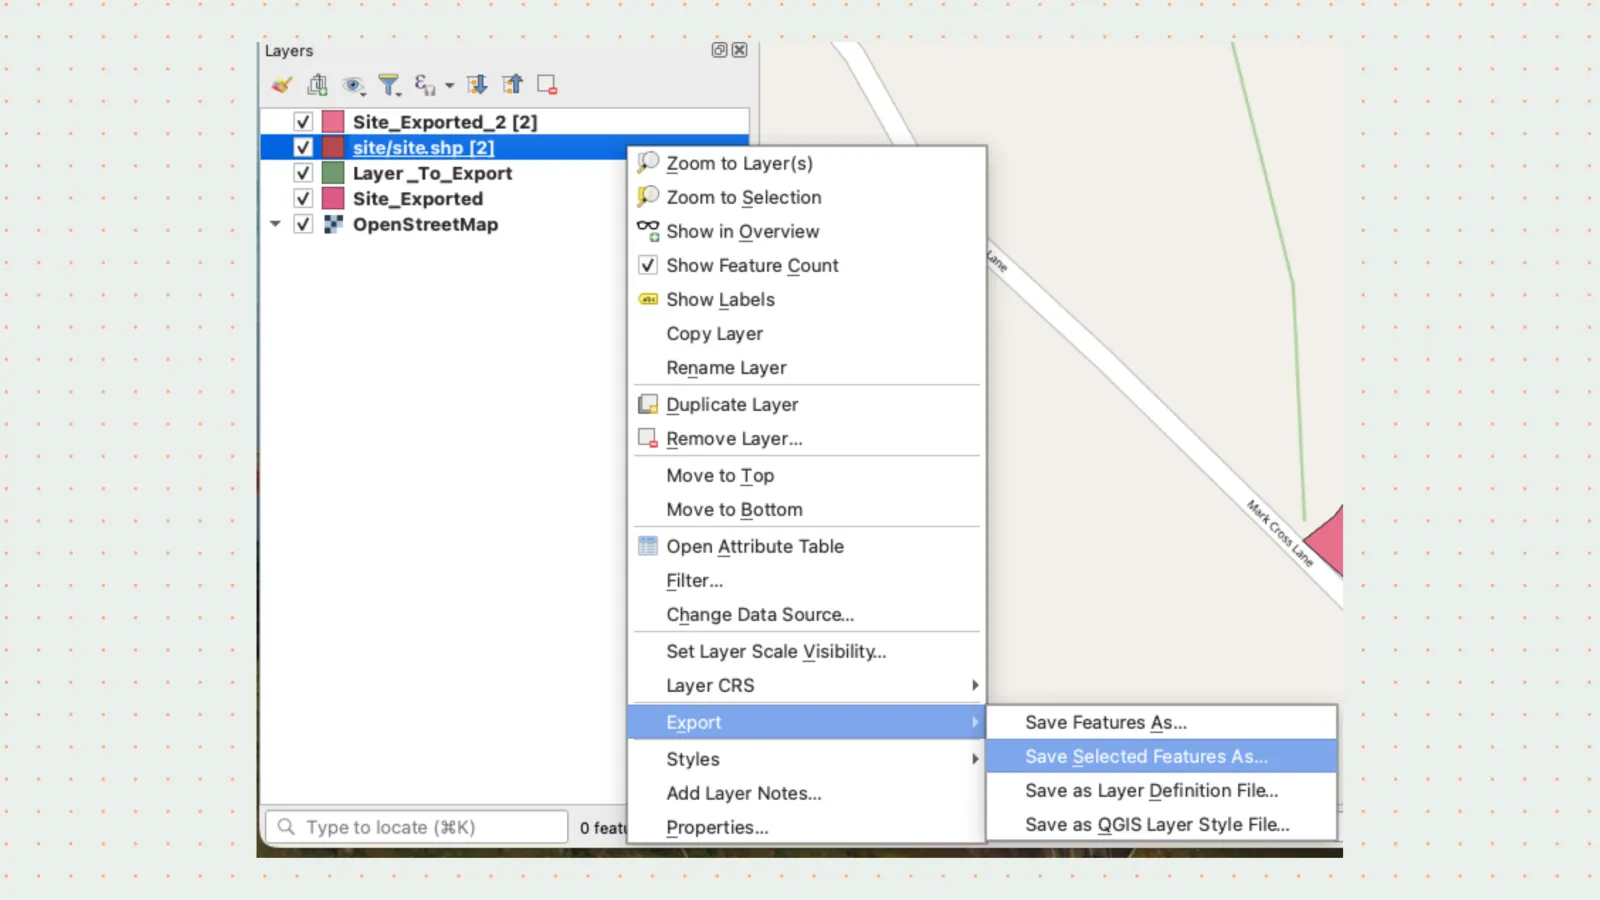
Export selected features
Right-click your layer in the Layers Panel and choose Export → Save Selected Features As...
Configure export settings
Apply these settings in the export dialog:
Setting Value Format Esri Shapefile Filename Your chosen file name CRS EPSG:4326 Geometry Type Polygon Include Z dimension No 
Compress the shapefile files
Select all 6 exported files (
.shp,.shx,.dbf,.prj,.cpg,.qmd), right-click, and compress them. On Mac, choose Compress / Zip; on Windows, select Send to → Compressed (zipped) folder.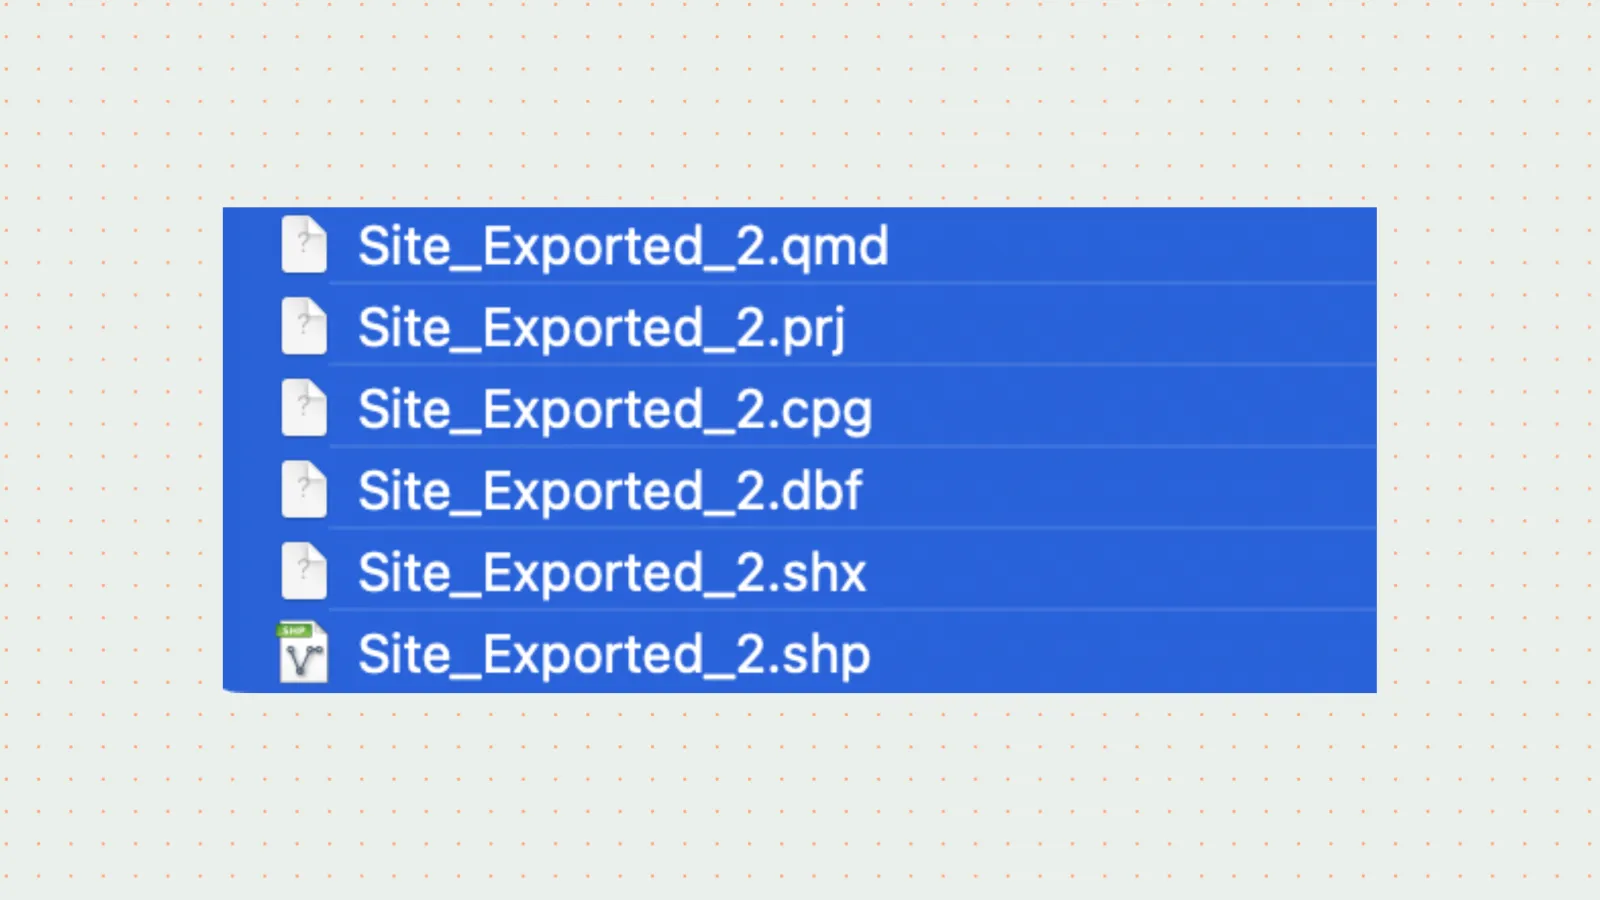
Upload to SchemeFlow
Open SchemeFlow and drag your
.zipfile into the shapefile upload zone.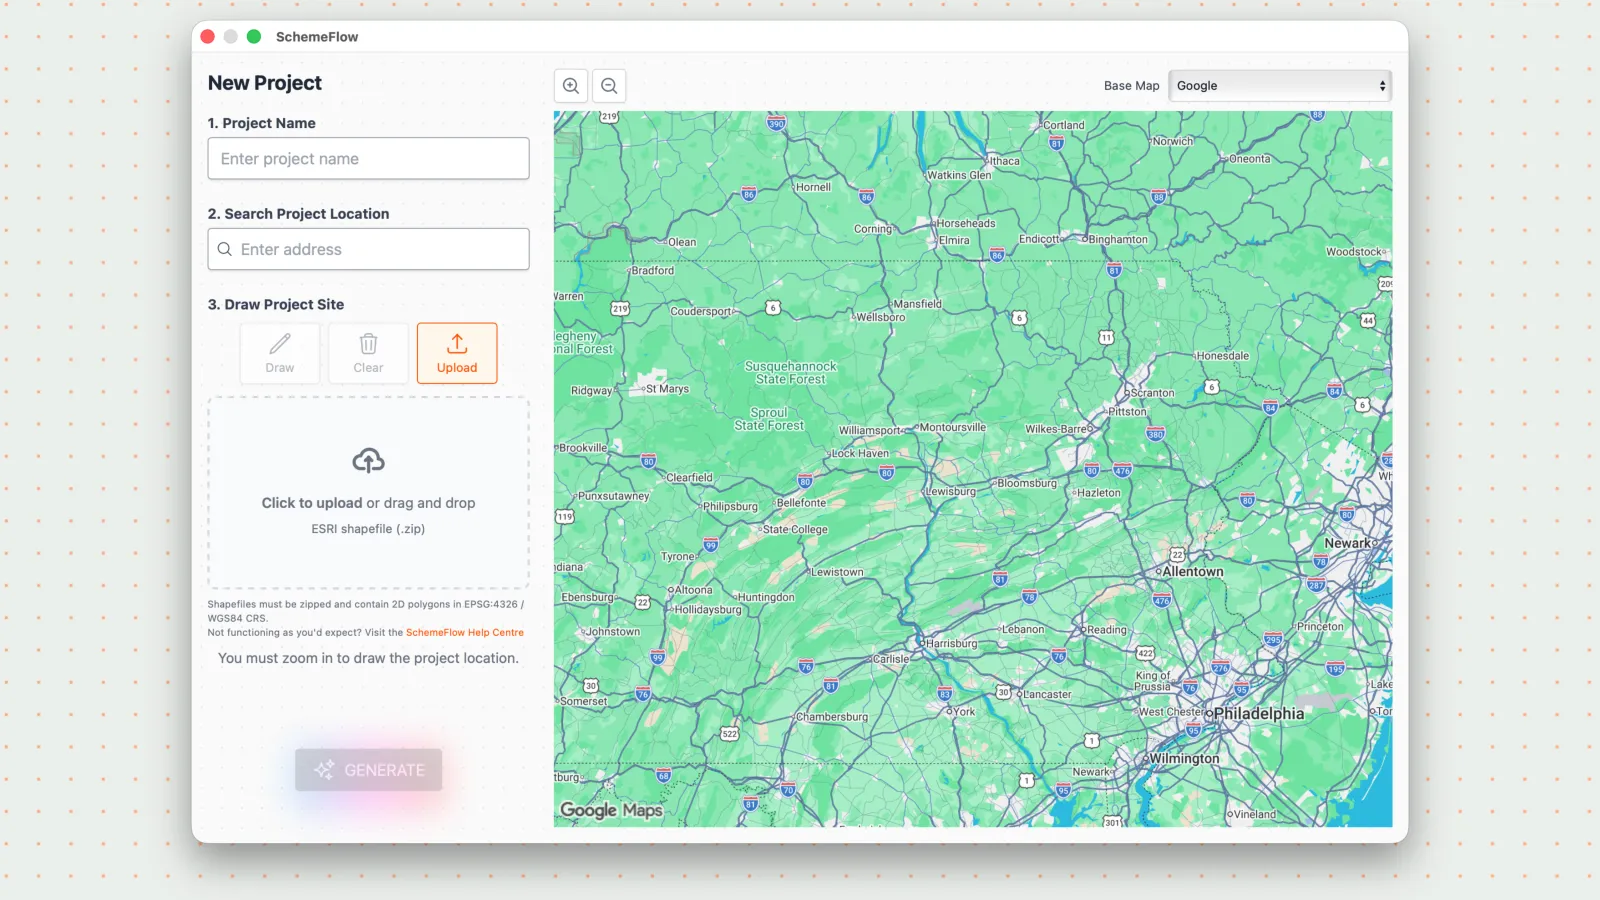
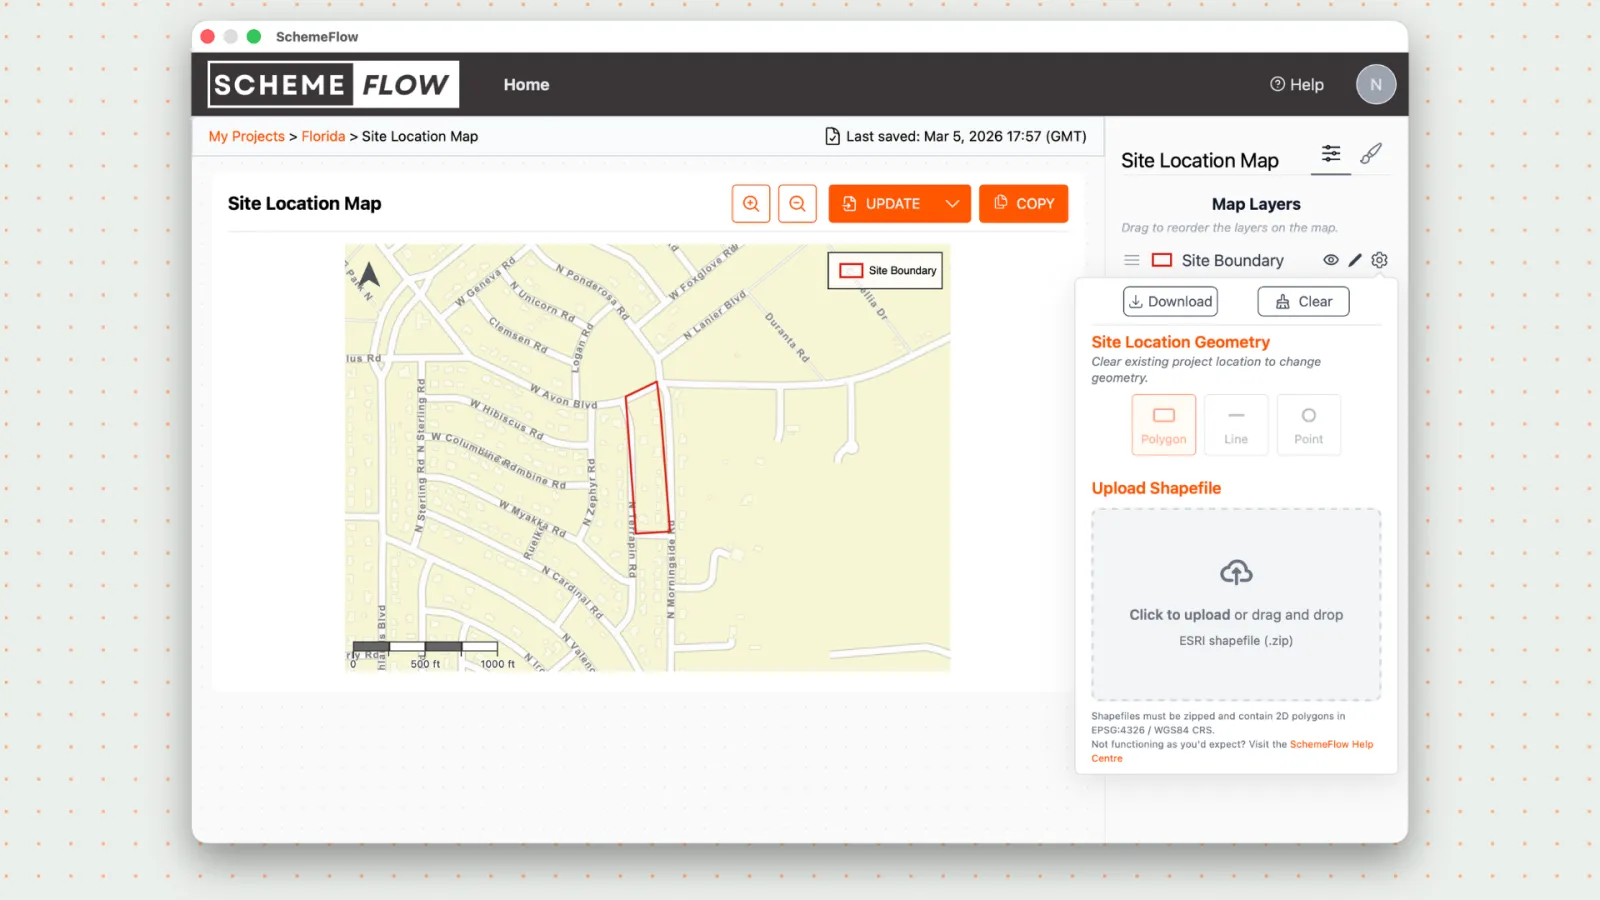
Already drawn a site boundary?
If you've already drawn a site boundary, it can be edited using the cog icon.
Common errors to check
- Uncompressed shapefile: Compress the files into a zip folder.
- Wrong file type: Only shapefiles are accepted, not PDFs or DWG files.
- Incomplete export: Ensure you're exporting the site boundary polygon, not just polylines.
- 3D geometry: Exports from CAD often default to 3D polylines — ensure 2D exports.
- Coordinate system: Verify your CRS is EPSG:4326 / WGS84 and appropriate for your location.